How to barbell squat properly?
Take it serious. Serious people lift serious weights. Build maximum tension and focus. The setup is the most important part of the lift. The rest is execution. Learn more in the following article.
Related articles
What is your why
Before we go into the intricacies of the barbell squat let me ask you a couple of questions:
- Why do you want to barbell squat?
- Why do you want to get stronger?
- Why do you want to pack on muscle?
- What happens if you do?
- What happens if you don’t?
These are implemented questions. When you answer them truthfully and seriously you will be more likely to succeed. What seems trivial is essential to your long-term success. Most people approach their life in this fashion
- What do I want
- How do I get it
- Why do I want it
Almost everyone knows what they want. Fewer have a plan how to get there. Almost none know why they want what they want. In this mode, you will be a victim of your surroundings. What you want will change based on whom you meet, what you see and which media outlet you listen to. It is interesting what happens when you flip this on its head
- Why do you want something
- How do you get it
- What do you need to do
This way whom you meet, what you see and which media outlets you listen to is determined by your most inner beliefs. Your interactions will bear more integrity. You will be more likely to trust yourself. Others will be more likely to put trust in you.
This means for your fitness goals that it becomes way more likely that you will achieve them. If you want to learn how this works on a deeper read Daniel Kahneman's book thinking fast and slow. If you are still not convinced look up Simon Sinek's TED talk on the golden circle. He makes a very compelling case telling the story of the Wright brothers.
For me the self journal from best self-played a big role in getting my fitness goals in check and make this blog take off. I highly recommend it for yourself and your ambitious friends and coworkers to get more done in less time.
Setup for height
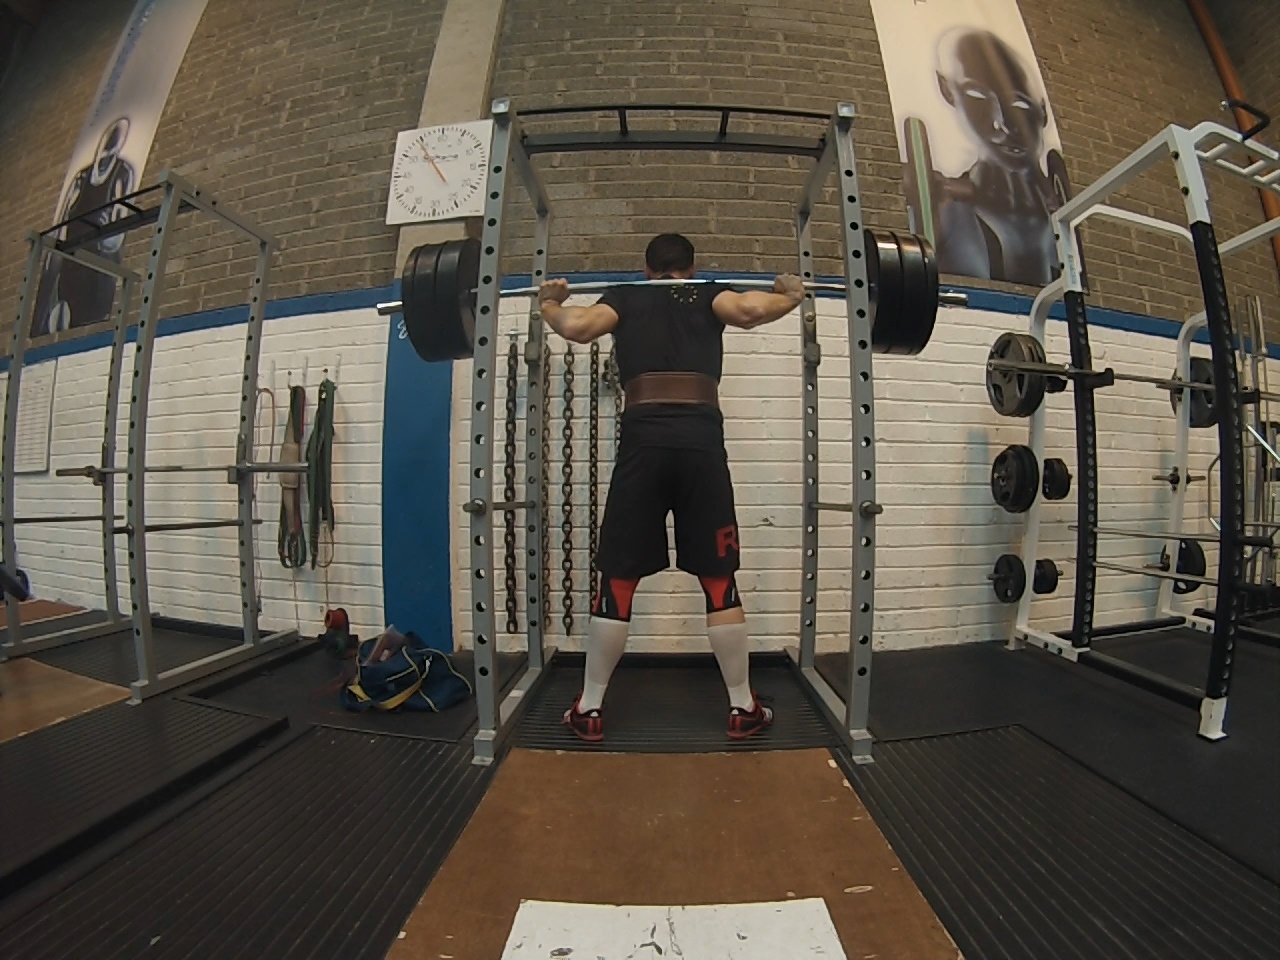
Place the J cups at the right height in the rack for you. The J cups are the attachments on which your barbell sits. You want the bar at a height that enables you to get under it while being able to unrack it with little effort. Once you are under the bar you should be able to unrack it by popping your hips forward. When this is done the bar should be high enough that you can walk out without hitting the J cups.
Try the first instinctive height. After this try one lower and higher setup in a good rack. A good rack has holes with smaller increments for your setup. Cheaper racks have the holes spaced out further and mostly leave you with only one option.
Once you hit the sweet spot take note of it. Try to use the same rack every time and the same hole. This makes life a lot easier.
Safety setup
There are several variations for the safety setup depending on the facilities. The most common are
- Free space
- Symmetrical load
- Safety pins
- Safety bands
If you are lifting in an Olympic weightlifting facility it is very likely that you will use a squat stand instead of a rack. Squat stands have the advantage that you are able to move more freely and throw the bar around. The disadvantage is that you can not set up safety pins for squats. As it is ok to drop weights in this setup practice deloading by dropping the weight backwards with low weights. Make sure you exit going forward to get some distance between you and the bar.
In all facilities check that there are no obstacles in the area where you squat. I have seen one nasty accident sending a guy into a mirror and whacking the person next to him with the bar because he did not remove all plates around the rack and tripped. You do not want 100kg+ unhinged because you did not take precautions.
It is also important to pay attention to a symmetrical load on your barbell. Even at powerlifting meets weights get misloaded and there are pros at work. Check that you have the same weight on both sides of the bar. If you notice anything unusual when you unrack It is safer to rerack and checks than push through.
Always set up the safety pins or bands before you start your session. Most of the time you won’t need them. The one time you do need them you definitely want them there. To setup safety pins at the right height squat as low as you can. Put the pin on the nearest hole below the bar in this position. Follow the same procedure with bands but choose a setup a little higher. Bands tend to sag in the middle.
Use collars on your top sets. When you are working up it can be annoying to get them on and off. Definitely get them set up on your last set of the day or heaviest.
Work with a spotter on your one repetition maximum attempts or for loads which you have not done before. If you have no spotter, leave that last rep be and put the bar back in the rack. I got some nasty injuries because I did not listen to my own advice.
Hand placement
Hand placement follows two simple rules
- Place your hands as close to your torso as possible
- The bigger you are the wider the grip
Many place their grip too far apart for their size. You want to put yourself in the best position to build tension. The closer the grip the easier it is for the squat. The limiting factor to this is your size. You still have to be able to get your body under the bar. When you put your hands directly beside each other that becomes impossible.
A good starting point is to go one thumb length outward from the inner knurling. From there adjust a little outwards or inwards depending on your size.
Getting under the bar
Get under the bar with determination and aggression. This is where you start wrestling the weight. If you are timid it won’t move.
Turn in your elbows as if you were to squeeze lemons in your armpits. After this wedge yourself under the bar so that it can not move on your back. This will make you stronger and also minimize marks on your back from squatting.
There is a big discussion on squat pads out there. Many pros will disagree with the use of them. Some will say that they are not allowed in competition. Others will say that you just have to man up. The opinion I agree most with is that pads are an unnecessary security risk. They are used by many and badly maintained. Most people do not know how to set them up correctly. If a pad fails it comes more abrupt and unexpected than failing the squat. The result can be a serious elbow or shoulder injury. I personally say only use them with very light weights. If you use very light weights you might as well squat with kettlebells, a plate or a weighted vest instead.
Build tension by tucking the elbows in and wedging yourself under the bar. When done pop your hips forward to unrack the weight.
Walk out
There are several versions of the walkout depending on the setup.
- No walkout
- Two-step walk out
- Three steps walk out
- The rest is waste
If you are a geared powerlifter or at a powerlifting meet, you sometimes do not need to walk the weight out. This is the least common case. For this, you need special equipment which is called a mono lift station. Some racks can be converted in a monolift. With this contraption, the resting spot of the barbell gets out of your way by itself.
The two-step walkout is a variation which can work with practice. In this variation, you walk out with one leg first to plant it for the squat. The same is immediately done with the other leg. This requires a lot of precision and practice. The advantage of this is that you have less time under the bar and therefore more strength left to do the squat. The disadvantage is that you are very likely to bang off most racks and stands on the second step. This is not detrimental on small weights. However, If a high weight gets out of control the best case scenario is that you regain control and can not complete the lift. The most likely scenario is an injury. This is why you do not see a lot of powerlifters doing a two-step walk out.
The most secure and practical version is a three-step walk out. The first step is used to get some distance between you and the rack. The second and third are used to plant the feet. This setup works with any rack in any environment. This is why this is the most popular option.
Any step more than three is a waste for the squat. You do not need two body lengths between you and the rack to be safe.
Build tension
Once you have walked out you want to build maximum tension for the lift. The setup is everything to complete the lift.
Breathe out all air from your lungs. Breathe back in sharply into your belly. Brace your abdominal muscles. The goal is to turn your body into a Cylinder of steel. Do not just push out to the front. Push into all directions.
While you are breathing and bracing pull the bar into you with your arms. At the same time push against it with your shoulders. The goal is to bend the barbell around your back like a horseshoe.
Squeeze your glutes and get your bum under the bar. With this, you finish building maximum tension. If you have done all of this right and the weight is not too heavy the rest will happen by itself. You won’t even really think about it.
Descend
There is a lot of debate about squat depth. The deeper you squat, the harder it gets. The reward for this is that you train more muscles. Long-term you get better results in less time when squatting to depth.
Really deep squats are often described as Ass to grass squats. While powerlifters squat as deep as they must weightlifters squat as deep as they can. A powerlifter has no benefit of squatting deeper than needed in competition. Anything below is a waste of resources. Weightlifters have a vested interest to squat as deep as possible as fast as possible. Getting under the bar deep and quickly enables to get more weight overhead.
Beginners should squat as deep as their mobility allows. This is usually not that deep. It takes years to perfect your squat. Work to get there gradually and never be satisfied with your depth.
Your descend should be as fast as possible while being controlled. Weightlifters have a bigger tendency to “bomb” into the hole. This means they descend very fast and make use of the bounce at the bottom to get up. Many powerlifters have more of a “grinder” style. This means they do not descend as fast to make full use of their lower back strength.
These variations are depending on your hip structure and personal preferences. Try around a little and stick with what makes you feel strongest.
Ascend
Make sure to press the floor away from you with both feet. Activate your glutes on the way up. Many forget to squeeze their butt cheeks for that extra boost.
Another tip is to press yourself back into the bar after hitting the hole. Actively press up with your body against the bar while pushing with your arms. This works especially well when you have a strong lower back.
Repetitions
Depending on your goals you will work somewhere between 2 - 12 repetitions a set for the barbell squat.
- 8 - 12 repetitions at 50 - 70 % for bodybuilding
- 5 - 8 per set at 60% to 85% for powerbuildig purposes
- 2 - 7 repetitions at 70 - 95 % for powerlifting purposes
Some programs you can try out are
- Stronglifts 5x5
- Wendler 531
- Smolov Jr
- Juggernaut method
- Shortcut to size
Low bar squat
The low bar squat is usually preferred by powerlifters. When you wedge yourself under the bar you will find two different shelves on your back. The first is for the high bar squat, the second for the low bar squat. They are usually just millimetres apart and make a considerable difference to the movement.
The low bar squat makes more use of your lower back muscles. It also provides more support for the bar on your back. This proves to be beneficial for very high loads that do not need to be moved fast. Ideal for powerlifters. They still have to move the weight aggressive and fast, but speed of the movement is not rewarded as much as for Olympic lifters.
High bar squat
The high bar squat uses the higher shelf on your back to perform the squat. This usually leads to less low back activation and higher activation of the quads. This makes it a little more beneficial to weightlifters.
The high bar squat gives you a little better mechanics for speed and bounds at the expense of control and strength. This is great when the speed gets rewarded like in a clean and jerk. It is not so great when you put a truckload of weight on your back. Yes, weightlifters are still super strong. If, in addition, they would train the low bar squat for a year, their squat would go up. However, they don’t compete in the squat so they don’t care.
How to barbell squat properly
Be a pro. Take it serious. Serious people lift serious weights. Clean up the area. Commit to the lift. Build maximum tension. Be humble and progress steadily. These are the basic principles. The little tweaks and tips on this article have been gathered through several years of practice and attentively following other great lifters.
Most popular Rogue bars in 2020
This is an overview of the most popular Rogue barbells per views and click through rates for Marathon-Crossfit.com in 2020. If you want more details on how the data was collected you can dig deeper in what were the most popular Rogue products in 2020.
Classic barbell
The classic barbell is what you you will find in most gyms. They vary widely in their quality with the York ones being the most cost efficient and therefore at the lower end of the quality range. You might find barbells with bushing or bearing, still most of them will have bushing in your local gym.
If your local gym is serious about lifting you might find specific olympic weightlifting and powerlifting barbells. These have a more aggressive knurl to ensure more grip for the professionals. You will experience these to be rougher on your skin which has the benefit of being able to lift more and the downside of higher likelihood to get your skin damaged.
In addition the knurl marks are slightly different between olympic and powerlifting bars to show you where to put your hands. Usually the powerlifting bars are built to withhold more psi (basically tells you how mch weight you can put on the bar until it breaks) than olympic bars due to the fact that there is more load moved in the powerlifts than in olympic lifts.
Lifting is not always for beginners. You need proper technique, balance and a bit of strength to do it. Otherwise you might hurt your shins on the deadlift or pulll some muscles when squatting. Improper squatting might also harm your spine. So get proper advise or start deadlifting with other bars.
Further reading
- Are you sure about wearing the right shoes for squatting
Bench press or squat first
Bench press in a squat rack
Better breathing makes your squat stronger
Breathing Squat
Can kettlebells swings replace squats
Can you squat and deadlift on the same day
Challenge, Sore toda, Strong tomorrow
Confidential: Get rid of the machines and hire the squat
Detailed Smolov squat routine review
Eager to know about wearing the right suit for squatting
How to perform a back squat for crossfit for beginners
How years of quality cossack squats easily help your fitness
Overcome these sins of the squat
Squat: How many reps
Squat: How to improve
Squat: When to inhale and exhale
Squat without pads
Squat Calculator [Free Downloads]
The Truth squat or lunges?
Ultimate 30 day squat challenge that tighten and tone
What squat is best
Why are there so many squats in Stronglifts 5x5


