Squat without pad
This is an overview on how you can start to squat without a pad. You will find tips on how to set up for the squat, aftercare and some comments on equipment.
Setup
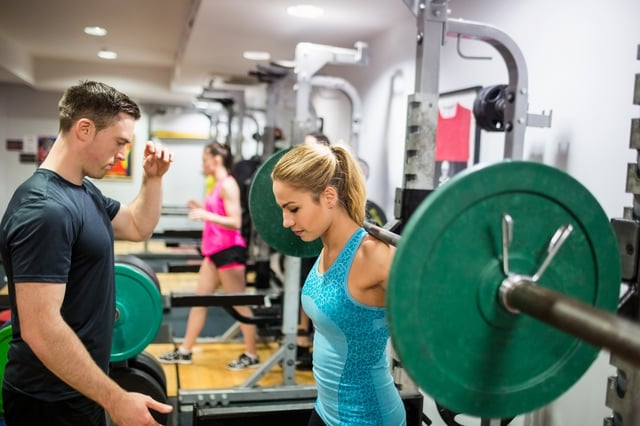
Before even going into the question on how to squat without a pad and whether you should do it or not it is important to look into your setup and how you are currently squatting. A good setup and the right choice of weight will leave you pain-free during the entire motion. If you know how to squat right the bar should not move an inch during the squat. If it does not move it cannot leave a mark. You might feel uncomfortable at first, especially if you have not build a lot of mass in the area in which the barbell will rest. Still, with a good setup, a pad is not needed and only adds risk due to possible malfunction.
The first thing to consider is your height. Set the J Cups up in a way that you only have to extend your hips slightly to unrack the bar once you have placed yourself under it. The ideal position should enable you to effortlessly unrack the bar and leave enough room between the J cups and the bar to walk out backwards. The bar is set up too high if you have to get on your toes to unrack. The setup is too low if you have to involve your glutes or even do a quarter squat to get to starting position. Once you can comfortably put the bar back in the rack by slightly leaning forward you have achieved the optimum setup. This becomes especially important once you progress to bigger weights.
Next thing to consider is that the weight is evenly distributed between your two hemispheres. To ensure that you load the same weight on both sides use the same plates on each. After this is done place your hands on the outer knurling. You might want to adjust hand positioning based on the make of the barbell you are using and your build. The smaller you are the more likely it becomes that your hands are placed further away from the outer knurls. Placing the hands symmetrically on the bar using the knurls as pointers will ensure that you grab the bar in a way that positions your body in the middle of the bar once you get under it. To finalise get your body under the bar and place the bar either
High Bar
The high bar position is the preferred option for Olympic weightlifters as the drive for this motion comes more out of the glutes and legs rather than leveraging the hip. For the high bar squat, the bar rests mainly on your deltoids. To set up for high bar search for the first natural shelf on your back and let the barbell rest there. It is also good advice to have your hands closer to your body in this setup which will naturally position the barbell higher on your back.
Low bar
The low bar squat position is more commonly used by powerlifters as it provides for a larger resting area for the barbell. In addition, this position allows you to incorporate the hips more in the movement. Usually, low bar squats move a bit less explosive than high bar squats while providing more stability to bigger weights. If you want to use the low bar squat find the second shelf on your back for the barbell. This is mostly somewhere high on the shoulder blades beneath the deltoids.
Tension
This is the most important so that you can squat without a pad. The pain from squatting without a pad usually derives from too much slack in the bar during the lift and too much weight being loaded on the barbell. Building enough tension for the movement will get rid of any unnecessary wiggle room during the squat. In consequence, you will not get hurt.
There are two main factors to building tension during the squat, bracing and pulling the bar in. To brace you release all the air from your body before initiating the squat and inhale deep into your stomach. Whilst doing this make your abs as tight as possible and push them out. Think of this as if you were preparing to receive a punch from Mike Tyson in the stomach. Get as tight as possible to get out of this onslaught unharmed. Hold this tension until you are back at the top of the movement and repeat the breathing. If you can hold your breath for several repetitions than keep the tension. This is a matter of practice.
The other factor is pulling in the bar to make it wrap around your body. Once you have decided
If you follow these steps you will not need a pad anymore as the barbell will rest nice and tight to your body during the exercise

Technique bar
You might be too weak and the bar too heavy for your build and maturity as a lifter. Even the best setup and technique will not help you if you are not ready for the barbell yet. Olympic barbells for men weigh 20kg and for women 15kg.
Rather than compensating bad technique or weakness by using a pad either progress to the barbell by performing goblet squats or use a lighter technique bar to get used to the movement patterns. I personally prefer athletes to do the Goblet squat and learn the movement patterns with a standard barbell rather than a technique bar. The technique bar is better suited for teaching proper form on the snatch and clean and jerk rather than the back squat.
Chalk
Chalk can help to provide a bit more resistance to avoid movement of the barbell during the squat. It is especially popular with powerlifters to apply chalk on the back of their T-shirts to add some little extra stability. I personally feel that it is not worth the effort and mess it makes for regular training. Keep this for one repetition maximum attempts and/or other crazy experiments. Chalk is not a supplement for a pad, good technique and a tight setup

A7 Shirts
There are shirts being provided by the company A7 which add some extra material in the area in which the barbell rests. This creates a similar effect to chalk without the mess and hassle. I personally do not own any merchandise from A7 but based on what I have seen and heard on Brandon Campbells YouTube channel I think this is an option which should be mentioned here.
Shower
In the end, your back will take a beating from time to time if you do not train with the intensity of a school choir boy and push yourself to get the desired results. A practical approach is
Conclusion
All the tips I have provided here are generalisations. Each lifter is different and must figure out what the best position for the barbell is on their back and how they create the tension in their entire body. This might mean that the bar will rest a bit higher on the deltoids or lower on the back. Experiment with what works best for you. Based on what I have seen most people who use a pad either work with weight that is above their capabilities and / or
Further reading
- Are you sure about wearing the right shoes for squatting
- Bench press or squat first
- Bench press in a squat rack
- Better breathing makes your squat stronger
- Breathing Squat
- Can kettlebells swings replace squats
- Can you squat and deadlift on the same day
- Challenge, Sore
toda , Strong tomorrow - Confidential: Get rid of the machines and hire the squat
- Detailed Smolov squat routine review
- Eager to know about wearing the right suit for squatting
- How to perform a back squat for
crossfit for beginners - How years of quality cossack squats easily help your fitness
- Overcome these sins of the squat
- Squat: How many reps
- Squat: How to improve
- Squat: When to inhale and exhale
- Squat Calculator [Free Downloads]
- The Truth squat or lunges?
- Ultimate 30 day squat challenge that
tighten and tone - What squat is best
- Why are there so many squats in Stronglifts 5x5


